Office installations include a built-in repair tool, and that’s the first place to turn when things go awry. The absolute worst case requires running a cleanup tool on the current Office installation, followed by a clean install of a new copy of Office. That has never failed in my experience, any time I’ve had to go that far. The steps to access the repair tool vary depending on your operating system.
Additional resources
This sort of thing does occur from time to time, and it is often quite easy to repair. If one or more Office apps is acting glitchy, work your way through this series of repair maneuvers, starting with the simplest. Come with me as I write this article in real time as I try to resolve the issue. If you’re lucky, you’ll find your problem covered, and SaRA will fix it for you. However, let’s return to Step 1 to start this process where it also usually ends. You’re working on a document or a spreadsheet, or using email, and BAM!
Microsoft Office Apps need Repair
If neither automatic nor manual repair works, there are some recovery methods that might help salvage your data. You can also take some preventive measures to avoid losing your work by automatically saving a backup copy of your workbook or creating a recovery file from time to time. Once you’ve installed the program, the home screen opens up, as shown in Figure 10.
Reinstalling Office
If you have to go this far during actual Office repairs, my condolences. You’re probably feeling pretty frustrated by now. We’re going to download and run a tool that completely obliterates your current Office installation. Then you’ll download and install a fresh, new installation from the Microsoft Office download page. This process seldom takes more than one or two minutes.
How long does a Microsoft Office repair take?
How Do I Repair Microsoft Office?
Just before the progress bar completed, a notification popped up to tell me that my Office install was complete. The installer window changed to an animated display that included what’s shown in Figure 8. The easiest way to determine this is to take the document to a different computer running another copy of Microsoft Office and attempt to open the document there. If it works, then it’s likely that your installation of Office is the problem, not the document. If it fails, it’s likely the document itself is at fault. Below the reset section in the Office Advanced Options (shown above) is an uninstall link.
- If yours works, count yourself lucky and get back to your normal routine.
- When the process completes, the "Done repairing" window appears, as shown in Figure 6.
- This process seldom takes more than one or two minutes.
- The absolute worst case requires running a cleanup tool on the current Office installation, followed by a clean install of a new copy of Office.
- You can also take some preventive measures to avoid losing your work by automatically saving a backup copy of your workbook or creating a recovery file from time to time.
Understanding HCM Software – Benefits, Players, and How to Choose
Even on my 2012 vintage test machine, it was done in under a minute (on a healthy Office installation, I cheerfully confess). When the process Office 365 support guide completes, the "Done repairing" window appears, as shown in Figure 6. Once you’ve clicked Change, you may see a User Account Control window asking for permission to run the repair program. Click Yes, and the built-in Office repair window appears. The Quick Repair option, as shown in Figure 2, is selected by default.
Step 3: Try the Microsoft SaRA
You’ll then need to re-download and reinstall Microsoft Office. When complete, a checkmark appears next to the Rest button. Unzip to a folder of your choosing, then run the file named SaraSetup.exe to install the program.
Like many programs, Microsoft Office’s tools can be extended by third-party add-ons. You can try uninstalling or disabling any you’re aware of. Exactly how you do this will depend on the specific add-on.
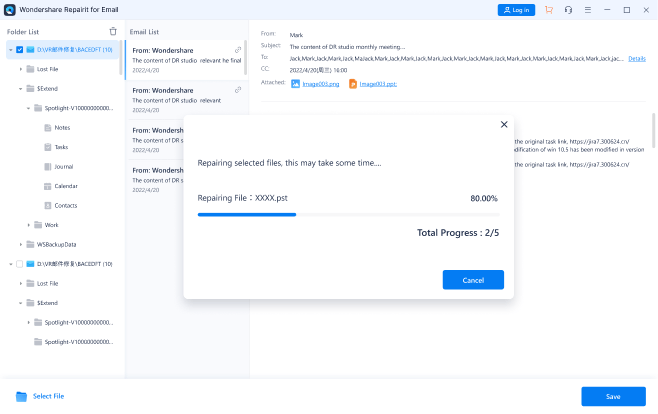
A progress bar appears and shows progress while the repair happens. Once done, a checkbox will be added to the repair button. With a backup copy of your workbook, you'll always have access to your data if your workbook is deleted accidentally or if it becomes corrupted. Choose one of the following methods to help recover your data. You can also try third-party software solutions to try to recover workbook. This takes you to the same screen shown in Figure 11 above, so you can keep going from here.
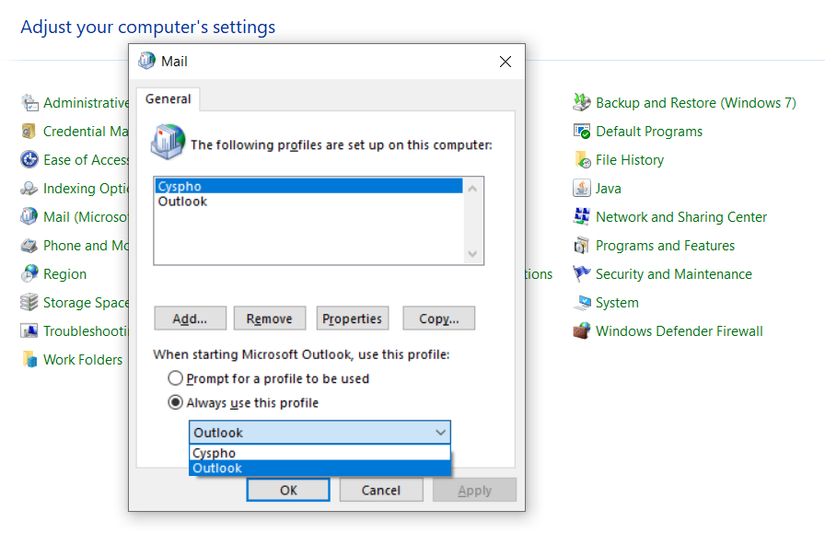
You’ll see a dialog box like the one shown in Figure 9 open up and ask you to confirm installation. If you have any Office applications open, you’ll be asked to close them before the repairs can complete. On my test machine, for example, I had Outlook open. This provoked the request shown in Figure 4 (where, of course, I clicked Continue to close Outlook so repairs could work through to completion). A window opens to ask you if you’re ready to commence repairs.